
CHARACTER: Iron Man Backup Dancer
Series: Iron Man 2
CONSTRUCTION TIME: V.1 4 days | V.2 2 days
DEBUT: Phoenix Comic Con 2013
Status: Active
Thoughts: I had lost a lot of weight before this costume and wanted something to test how comfortable I was with my body. I really liked the Ironette dancers from Iron Man 2 and when I wore this, I had an awesome time! People were also more amazed that my lights actually worked, too!
I had a lot of fun figuring out how to make this. I got a 4-way stretch material in red and yellow and altered a pattern for the top. The top is a bit uncomfortable as I used a stiff interfacing to keep the bottom’s shape for the top. Details were sown into various parts of the outfit which unfortunately also kept it from being stretchy. The belt detaches from the back and the front has velcro so I can pop the emblem onto it. The lights for the hands are detachable and were attached with two different types of glue. The lights are tap-on closet lights that were colored red.
The boots were my first covers ever. I used a pair of white boots lying around from another costume, made a quick pattern, attached a zipper and attached the cover to the boot. The top of the yellow is made of craft foam to keep the shape then attached to the boot by glue.
The boots were my first covers ever. I used a pair of white boots lying around from another costume, made a quick pattern, attached a zipper and attached the cover to the boot. The top of the yellow is made of craft foam to keep the shape then attached to the boot by glue.

2014 work in progress notes
This was an easy project but I wanted to focus on correct fabric types that Miku would have worn in the videos environment.
This was an easy project but I wanted to focus on correct fabric types that Miku would have worn in the videos environment.
read more...
VERSION 1
This dress was not easy as I wanted certain parts to be detachable as well as have a 1940’s show girl feel. The dress couldn’t be too short and the lapels would have to be removable for future replacements (such as a sequenced lapel if I wanted it). I heavily altered a pattern for the top using a u-bra that I would wear with the costume as my guide. I added an eyelet to the bottom of the V neck so I could attach a lapel to the bottom and installed a zipper in the back.
I mathed out how many panels of the skirt I would have to create in order for it to fit under the vest perfectly. I used a stiffer satin material for the vest and two different types of satin (the white was stiffer and the red was limp) for the skirt. The vest was fully lined and unhooks from the top so that it’s easier to step into the dress.
There are 14 panels in the skirt. Each panel was hemmed in their correct thread color to avoid the headache of hemming the entire skirt once all the panels were together. The middle of each pleat was sewn so that it would maintain the straight edge look for years. A cummerband was quickly drafted and put together with left over red material. The zipper was put in last after the skirt was attached to the vest.
The hat was hand drafted with help from online tutorials from an unofficial USO dancer group for this costume. Buckram, wire and felt hold the hat to keep its shape and hair pieces were placed inside so that it stays on. In the end, it took me about four days (one for drafting, one for the skirt alone, and the other two for the hat and vest). I had to make another one with three days to spare at a smaller size and I ended up knocking it out in 8 hours because I’d already did it once and kept my patterns. I’m still surprised I even did that.
VERSION 2
I always had plans on remaking the skirt. There weren’t enough pleats and once I kept wearing it I realized how much I really adored this little costume so re-making the skirt was an absolute MUST. I spent two back breaking days removing the skirt from the vest, making 12 red/white panels (respectively). The first version was patterned myself but I used some tips from the USO group that went to Dragon*Con a few years ago. I upped the panels from 14 total (mistakenly 16 whoopsie) to 24. Once finished, the underside was properly serged and attached to the vest. I continue to pull this costume out as it’s been one of my absolute favorites. It’s comfortable, very cute, and I’m always overjoyed when a real service member comes over for a photo. It’s a pleasure to make them smile!
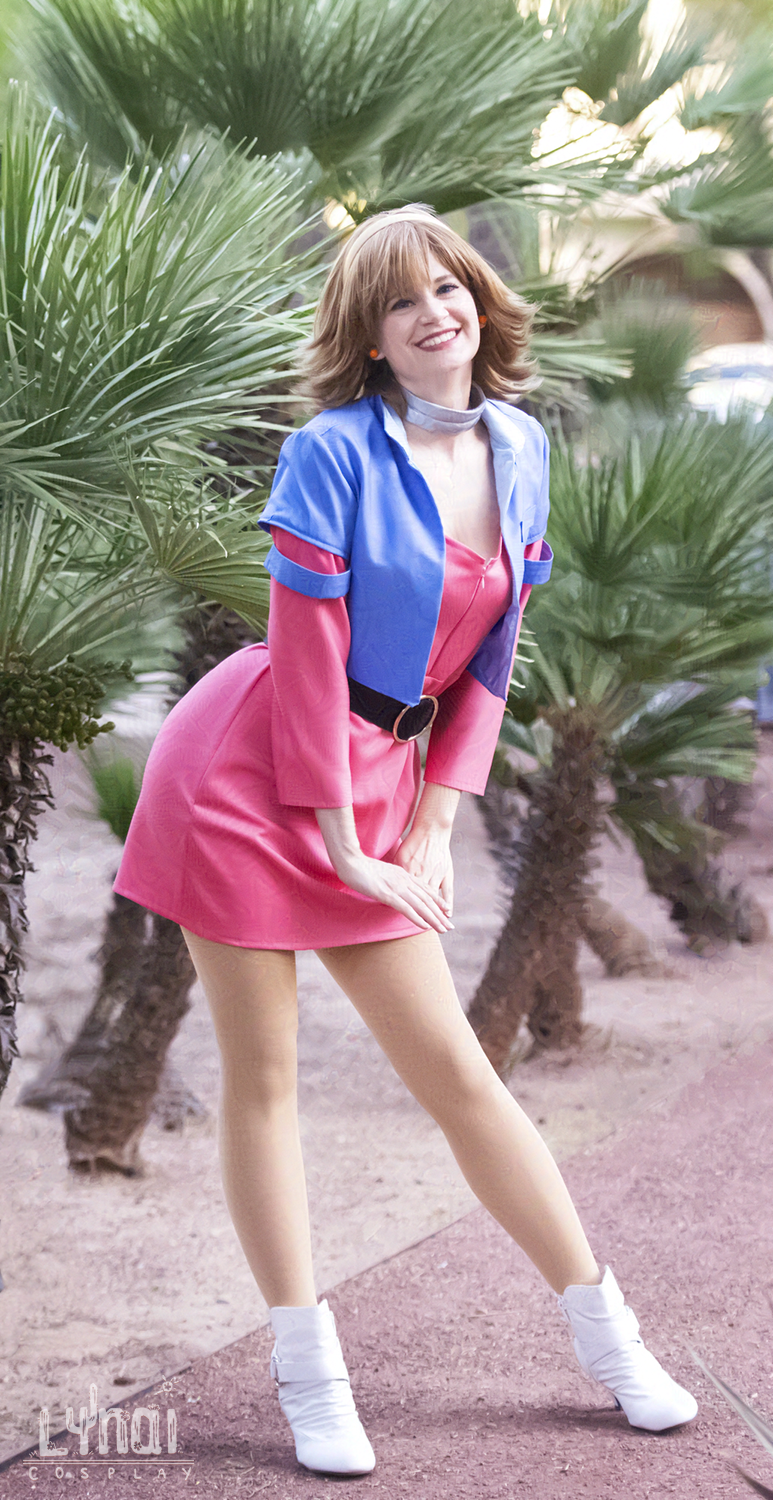
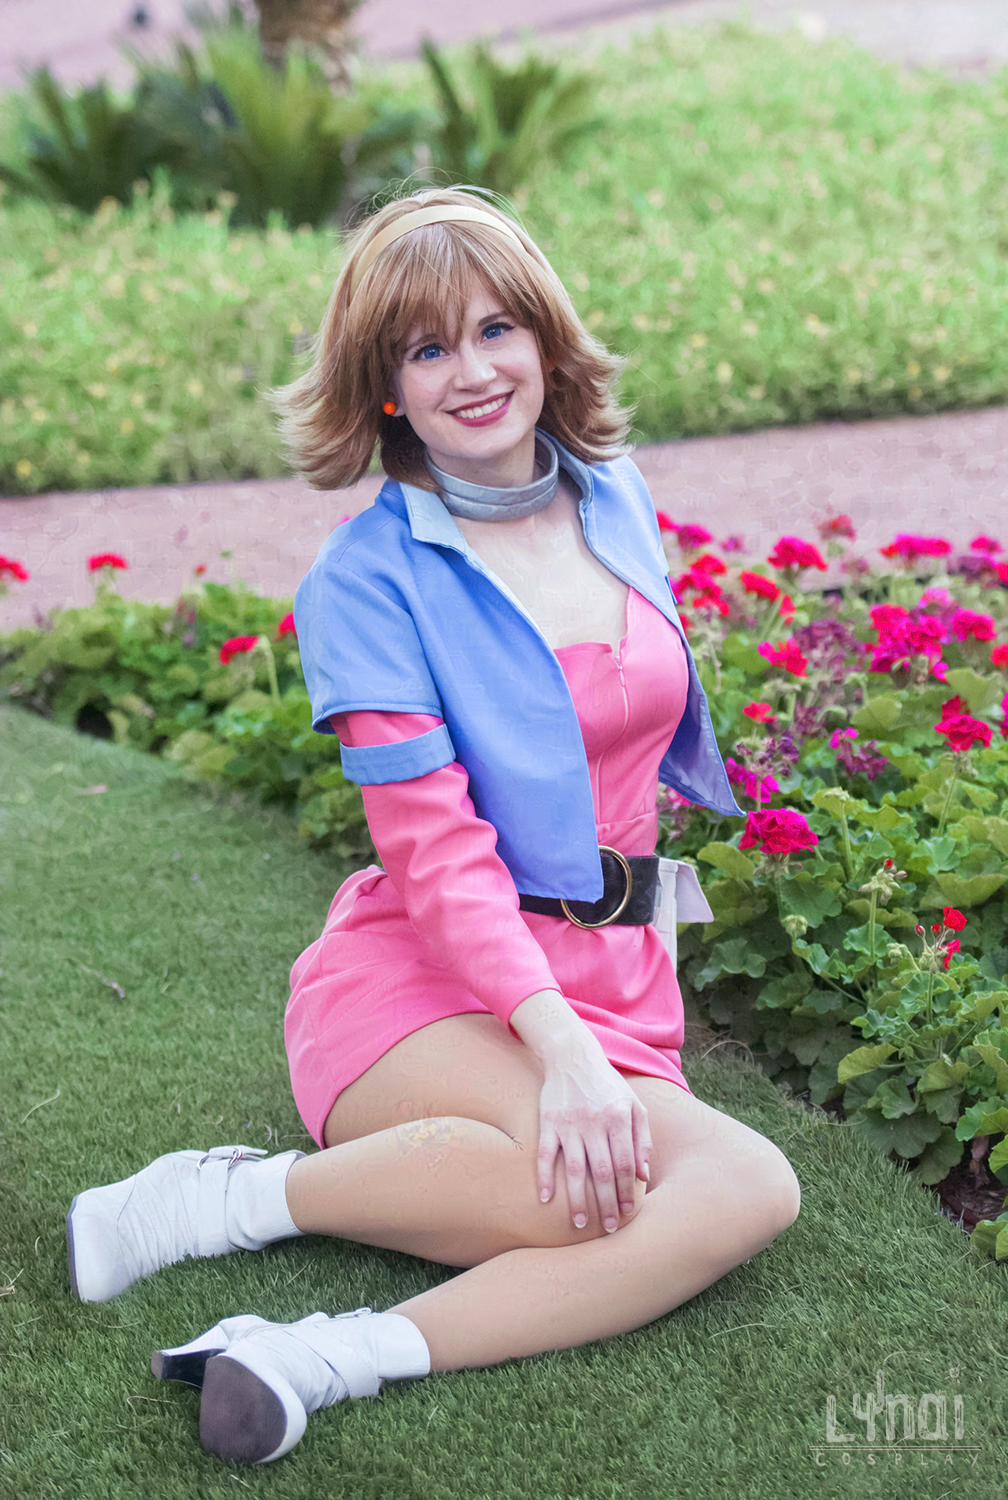
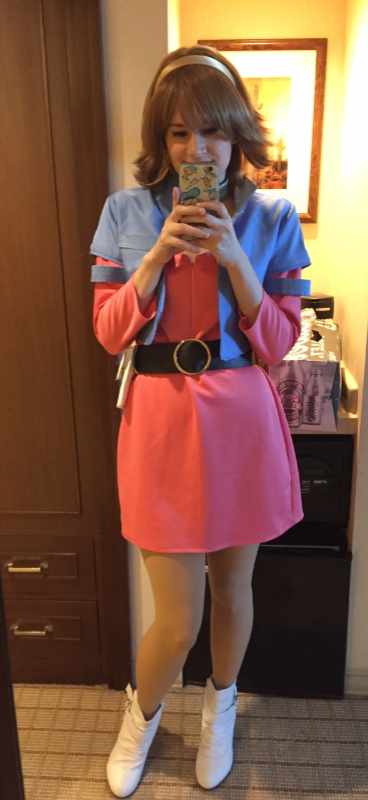
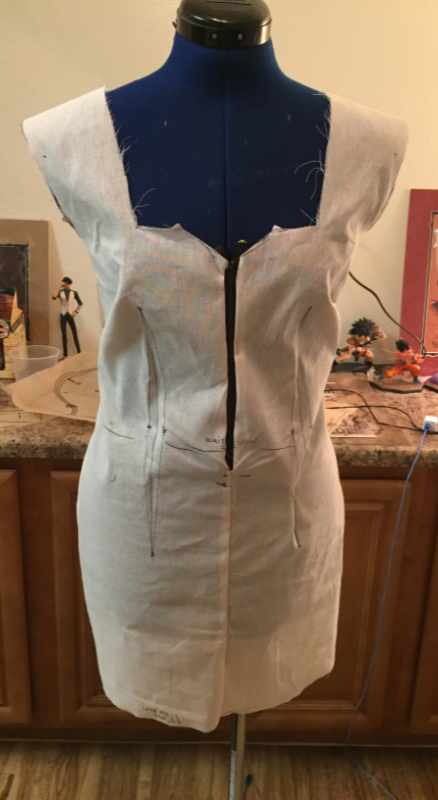
This time I was learning to be patient and mocking an entire cosplay versus just doing it in pieces.
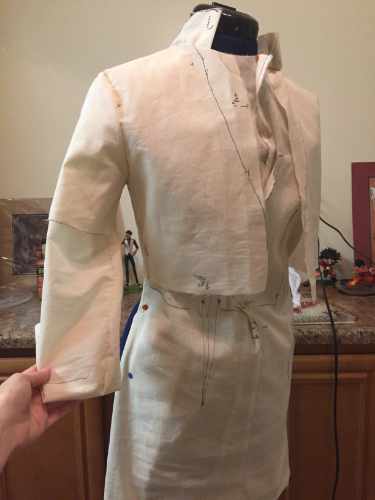
With the jacket, I lined it with a light blue fabric, made a fake pocket for the front then worked on the jackets cuffs. This was one of the reasons the old jacket failed. The cuffs were awful and held no shape. This time, I used two pieces of interfacing for both cuffs and used an invisible stitch to attach the lower part of the jacket to the upper part of the cuff. Because of the invisible stitch, the cuff looks like it floats on its own and holds it’s shape perfectly!
I was again strapped for time. During the construction of Rain, I had moved apartments, gotten a new job and suddenly it was time for PCC. The only other thing left to do was make the collar and the pouch. I made the pouch using faux white leather and again alternated it so that the only thing it could honestly hold was my phone and business cards. I used a magnet to keep the pouch snapped closed at all times. Finally, I sloppily did the neck piece by creating it out of worbla. I have plans to re-do the piece since it’s pretty awful but overall, I’m incredibly happy with my remake of Rain!
This dress was not easy as I wanted certain parts to be detachable as well as have a 1940’s show girl feel. The dress couldn’t be too short and the lapels would have to be removable for future replacements (such as a sequenced lapel if I wanted it). I heavily altered a pattern for the top using a u-bra that I would wear with the costume as my guide. I added an eyelet to the bottom of the V neck so I could attach a lapel to the bottom and installed a zipper in the back.
I mathed out how many panels of the skirt I would have to create in order for it to fit under the vest perfectly. I used a stiffer satin material for the vest and two different types of satin (the white was stiffer and the red was limp) for the skirt. The vest was fully lined and unhooks from the top so that it’s easier to step into the dress.
There are 14 panels in the skirt. Each panel was hemmed in their correct thread color to avoid the headache of hemming the entire skirt once all the panels were together. The middle of each pleat was sewn so that it would maintain the straight edge look for years. A cummerband was quickly drafted and put together with left over red material. The zipper was put in last after the skirt was attached to the vest.
The hat was hand drafted with help from online tutorials from an unofficial USO dancer group for this costume. Buckram, wire and felt hold the hat to keep its shape and hair pieces were placed inside so that it stays on. In the end, it took me about four days (one for drafting, one for the skirt alone, and the other two for the hat and vest). I had to make another one with three days to spare at a smaller size and I ended up knocking it out in 8 hours because I’d already did it once and kept my patterns. I’m still surprised I even did that.
VERSION 2
I always had plans on remaking the skirt. There weren’t enough pleats and once I kept wearing it I realized how much I really adored this little costume so re-making the skirt was an absolute MUST. I spent two back breaking days removing the skirt from the vest, making 12 red/white panels (respectively). The first version was patterned myself but I used some tips from the USO group that went to Dragon*Con a few years ago. I upped the panels from 14 total (mistakenly 16 whoopsie) to 24. Once finished, the underside was properly serged and attached to the vest. I continue to pull this costume out as it’s been one of my absolute favorites. It’s comfortable, very cute, and I’m always overjoyed when a real service member comes over for a photo. It’s a pleasure to make them smile!
 |
 |
|---|
With the jacket, I lined it with a light blue fabric, made a fake pocket for the front then worked on the jackets cuffs. This was one of the reasons the old jacket failed. The cuffs were awful and held no shape. This time, I used two pieces of interfacing for both cuffs and used an invisible stitch to attach the lower part of the jacket to the upper part of the cuff. Because of the invisible stitch, the cuff looks like it floats on its own and holds it’s shape perfectly!
I was again strapped for time. During the construction of Rain, I had moved apartments, gotten a new job and suddenly it was time for PCC. The only other thing left to do was make the collar and the pouch. I made the pouch using faux white leather and again alternated it so that the only thing it could honestly hold was my phone and business cards. I used a magnet to keep the pouch snapped closed at all times. Finally, I sloppily did the neck piece by creating it out of worbla. I have plans to re-do the piece since it’s pretty awful but overall, I’m incredibly happy with my remake of Rain!